hexo-blog环境配置
基本软件安装与配置
node安装
step 1: 进入nodejs官网 —- nodejs
step 2: Download for Windows(x64) —> 选择Long Term Support(LTS)项下载.
step 3: 打开msi文件, 等待guide wizard安装, 随后一路next即可(除了路径切换).
step 4: win+R —> 输入cmd —> 输入node -v查看版本信息 —> 显示版本代表安装成功.
git安装与配置
下载与配置过程过于麻烦, 考虑到本文主题, 这里不做详细介绍, 可参照git安装与配置.
hexo安装与配置
1 | //选择一个文件夹作为本地博客,右键 > Git Bash Here |
next主题下载
step 1: 下载next主题
method 1: 在本地博客文件夹右键 > Git bash here:
1 | cd hexo |
method 2: 进入next-github, 点击Code按钮, 点击Download ZIP. 将ZIP解压至本地文件夹的theme文件夹下, 并重命名为next(此处名称在设置主题时需要与配置文件保持一致).
step 2: 打开本地博客文件夹根目录下的_config.yml文件, 找到theme并配置为theme:next.
连接Github
step 1: 设置用户名和邮箱, 右键 -> Git Bash Here:
1 | git config --global user.name "你的GitHub 用户名" |
step 2: 创建ssh密钥, 输入命令ssh-keygen -t rsa -C "GitHub 邮箱". 进入 [C:\Users\用户名.ssh]目录, 找到”id_rsa.pub”右键->打开方式->记事本, 打开并复制里面内容.
step 3: 登录github, 点击头像->settings->SSH and GPG keys->New SSH key->将title命名为hexo,并将step 2复制的文本粘贴入key文本框中-> Add SSH key.
step 4: Git Bash -> 输入ssh -T git@github.com -> 出现”Are you sure…”, 输入yes确认.
step 5: 点击github页面左上角logo进入主页 -> Create a new repository -> 见下图介绍: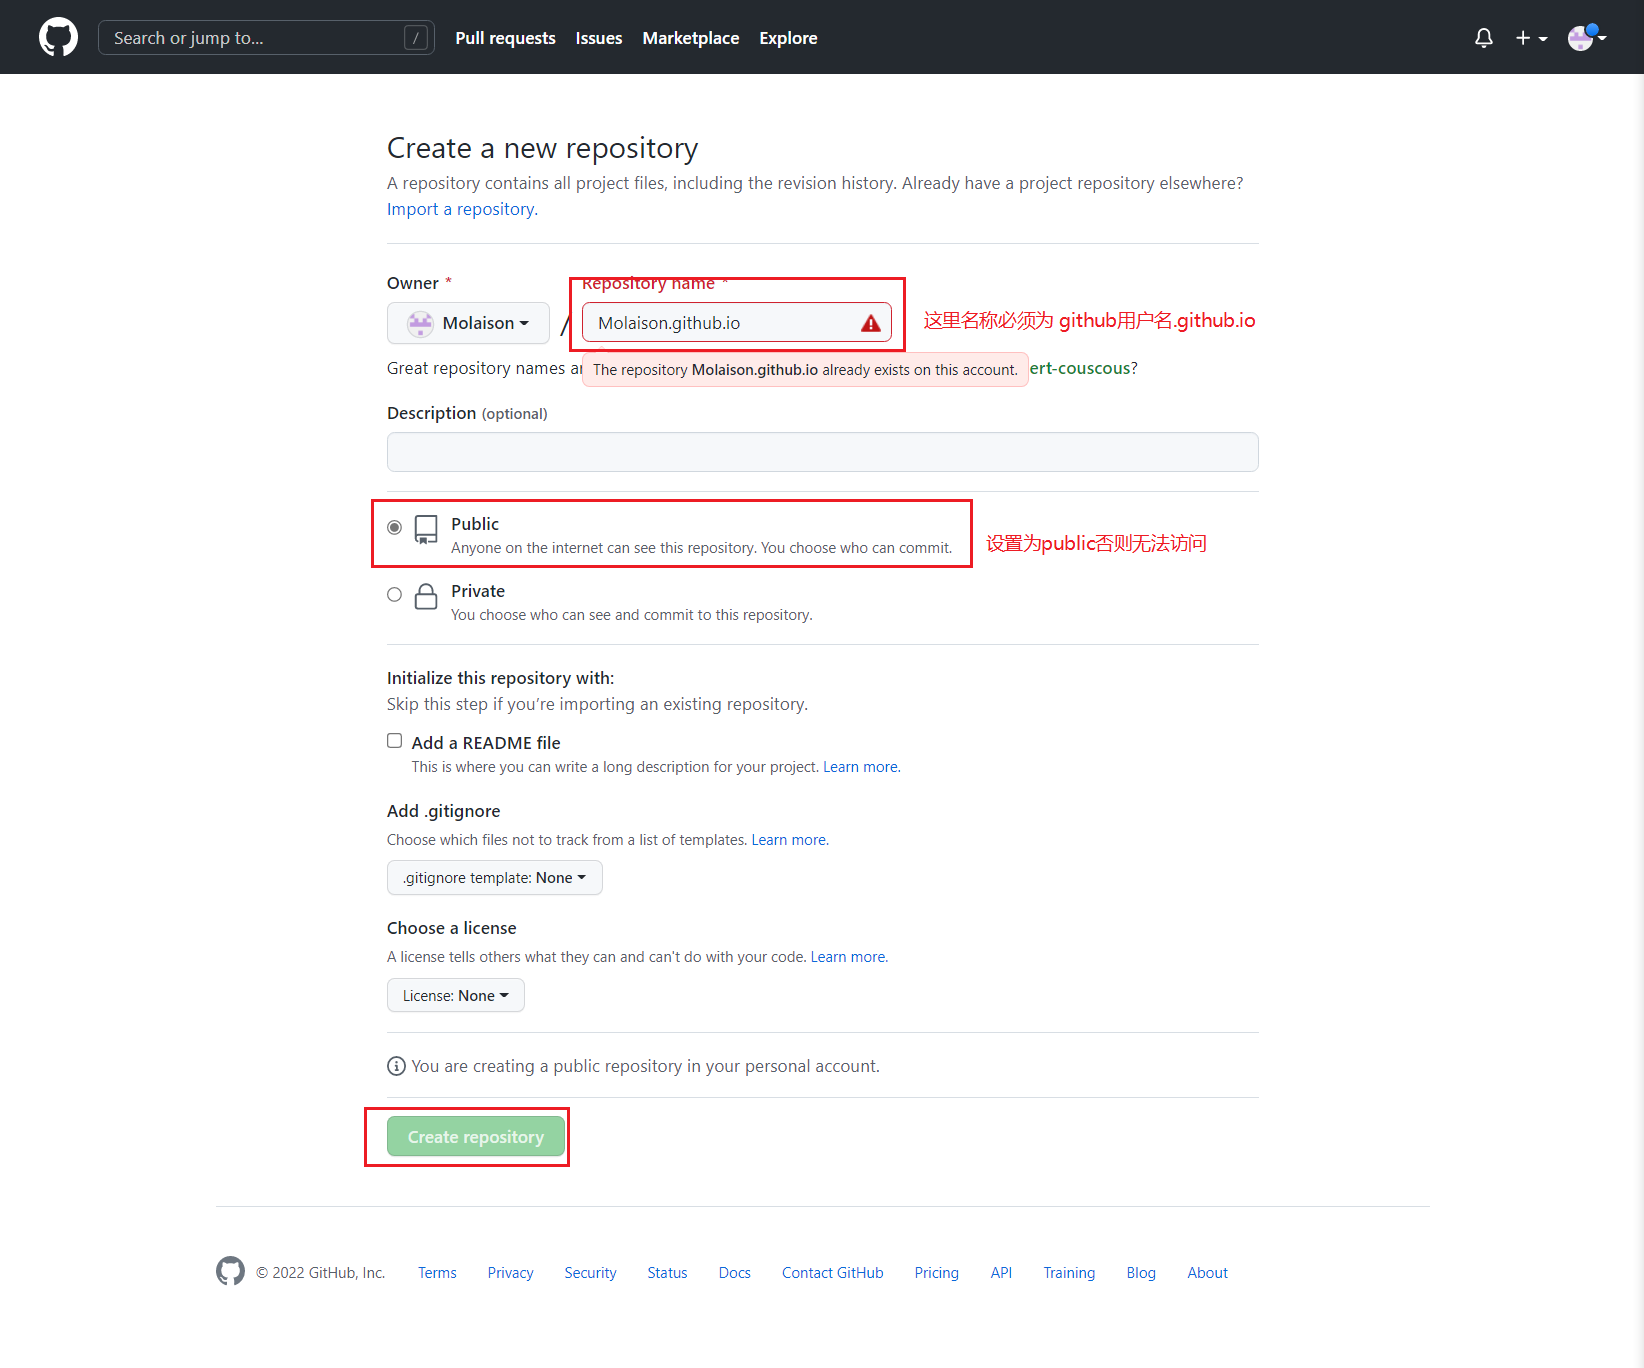
step 6: 打开博客文件夹配置文件_config.yml, 在末尾加上:
1 | deploy: |
需要注意的是, name为你的github用户名, 且每个”:”与后接的值之间必须要有一个空格;
图床配置
这里博主选择使用Github+Picgo+Jsdelivr搭建图床.
Github配置:与上一步一样,新建Github repository, 设置库为Public, 但是名称可以任意设置;
Token获取: GitHub主页 -> 右上角头像 -> settings -> Developer settings -> Personal access tokens -> Generate new token -> 填写note并点击Generate token -> 复制token;
Picgo安装: 从Picgo官网直接下载对应版本安装即可;
Picgo配置: 打开Picgo -> 图床设置 -> GitHub图床, 参考配置如下;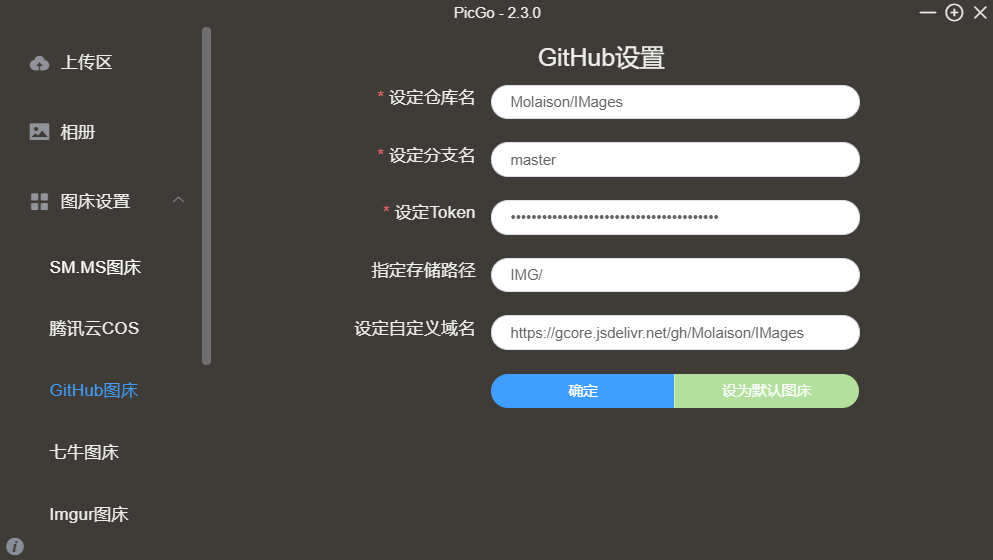
仓库名设定: “用户名/仓库名”, 也即下图中红框部分: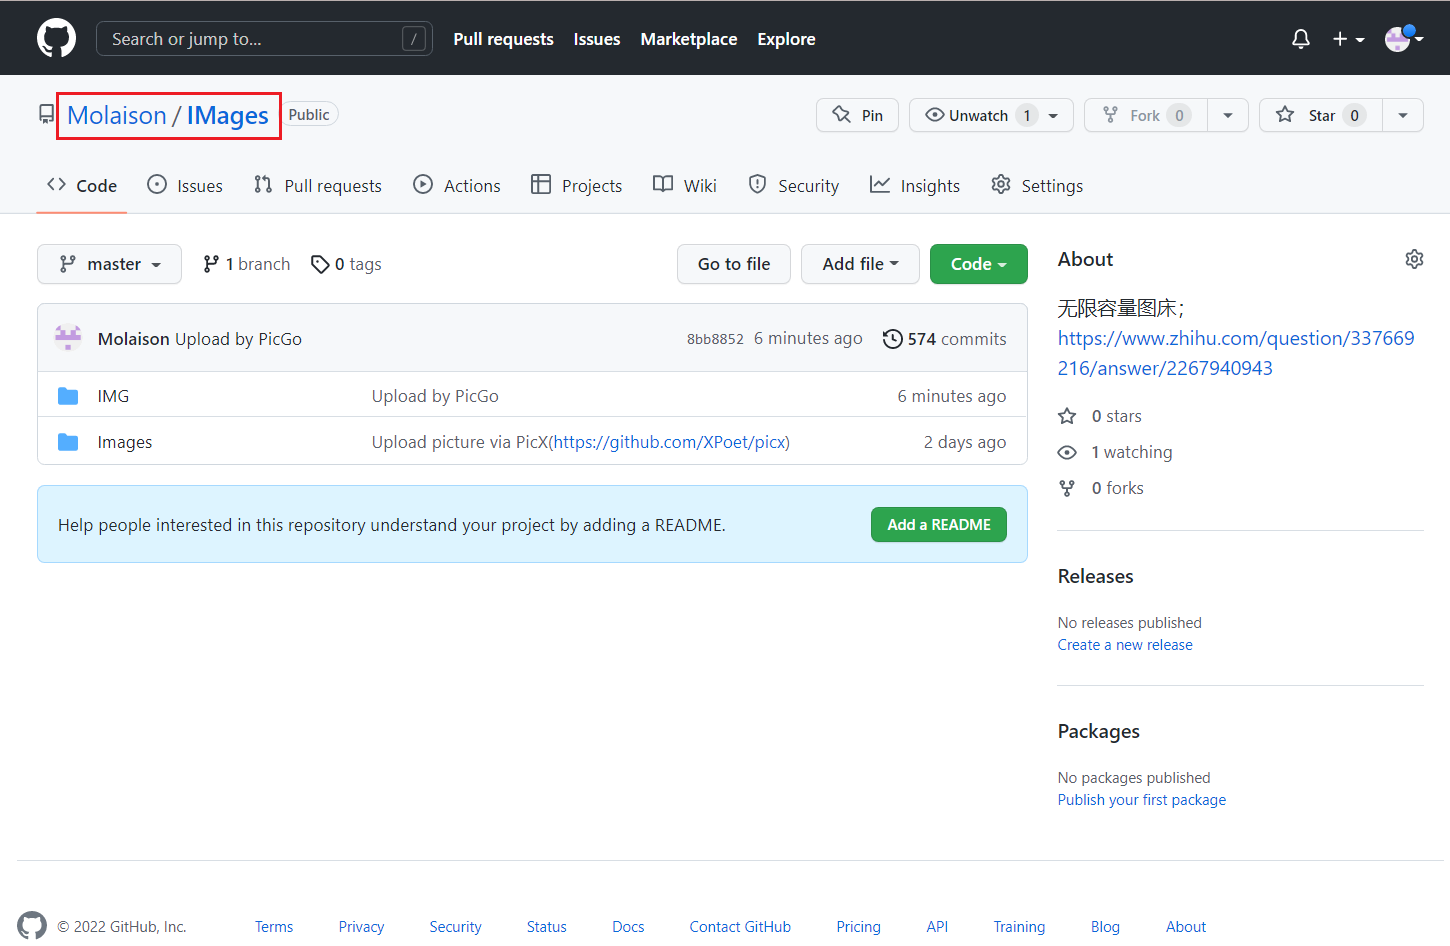
将第二步获得的token粘贴到对应输入;
指定路径表示我们上传的图片存放于库中哪个目录下;
jsdelivr加速: 由于github在不科学上网的条件下不稳定, 且速度较慢(通过修改hosts文件或者使用代理能够解决), 使用cdn为github加速. 配置如下: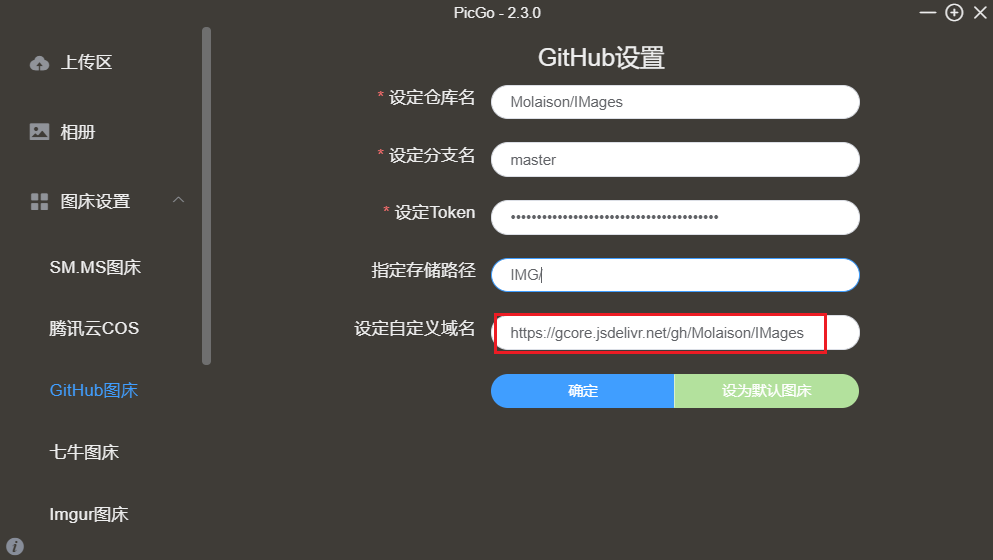
其他可用域名:
1 | CloudFlare: test1.jsdelivr.net |
替换图中gcore.jsdelivr.net即可;
网站主题与信息配置
站点信息配置
个人信息配置:
1 | title: Molaison's blogs |
网址信息配置:
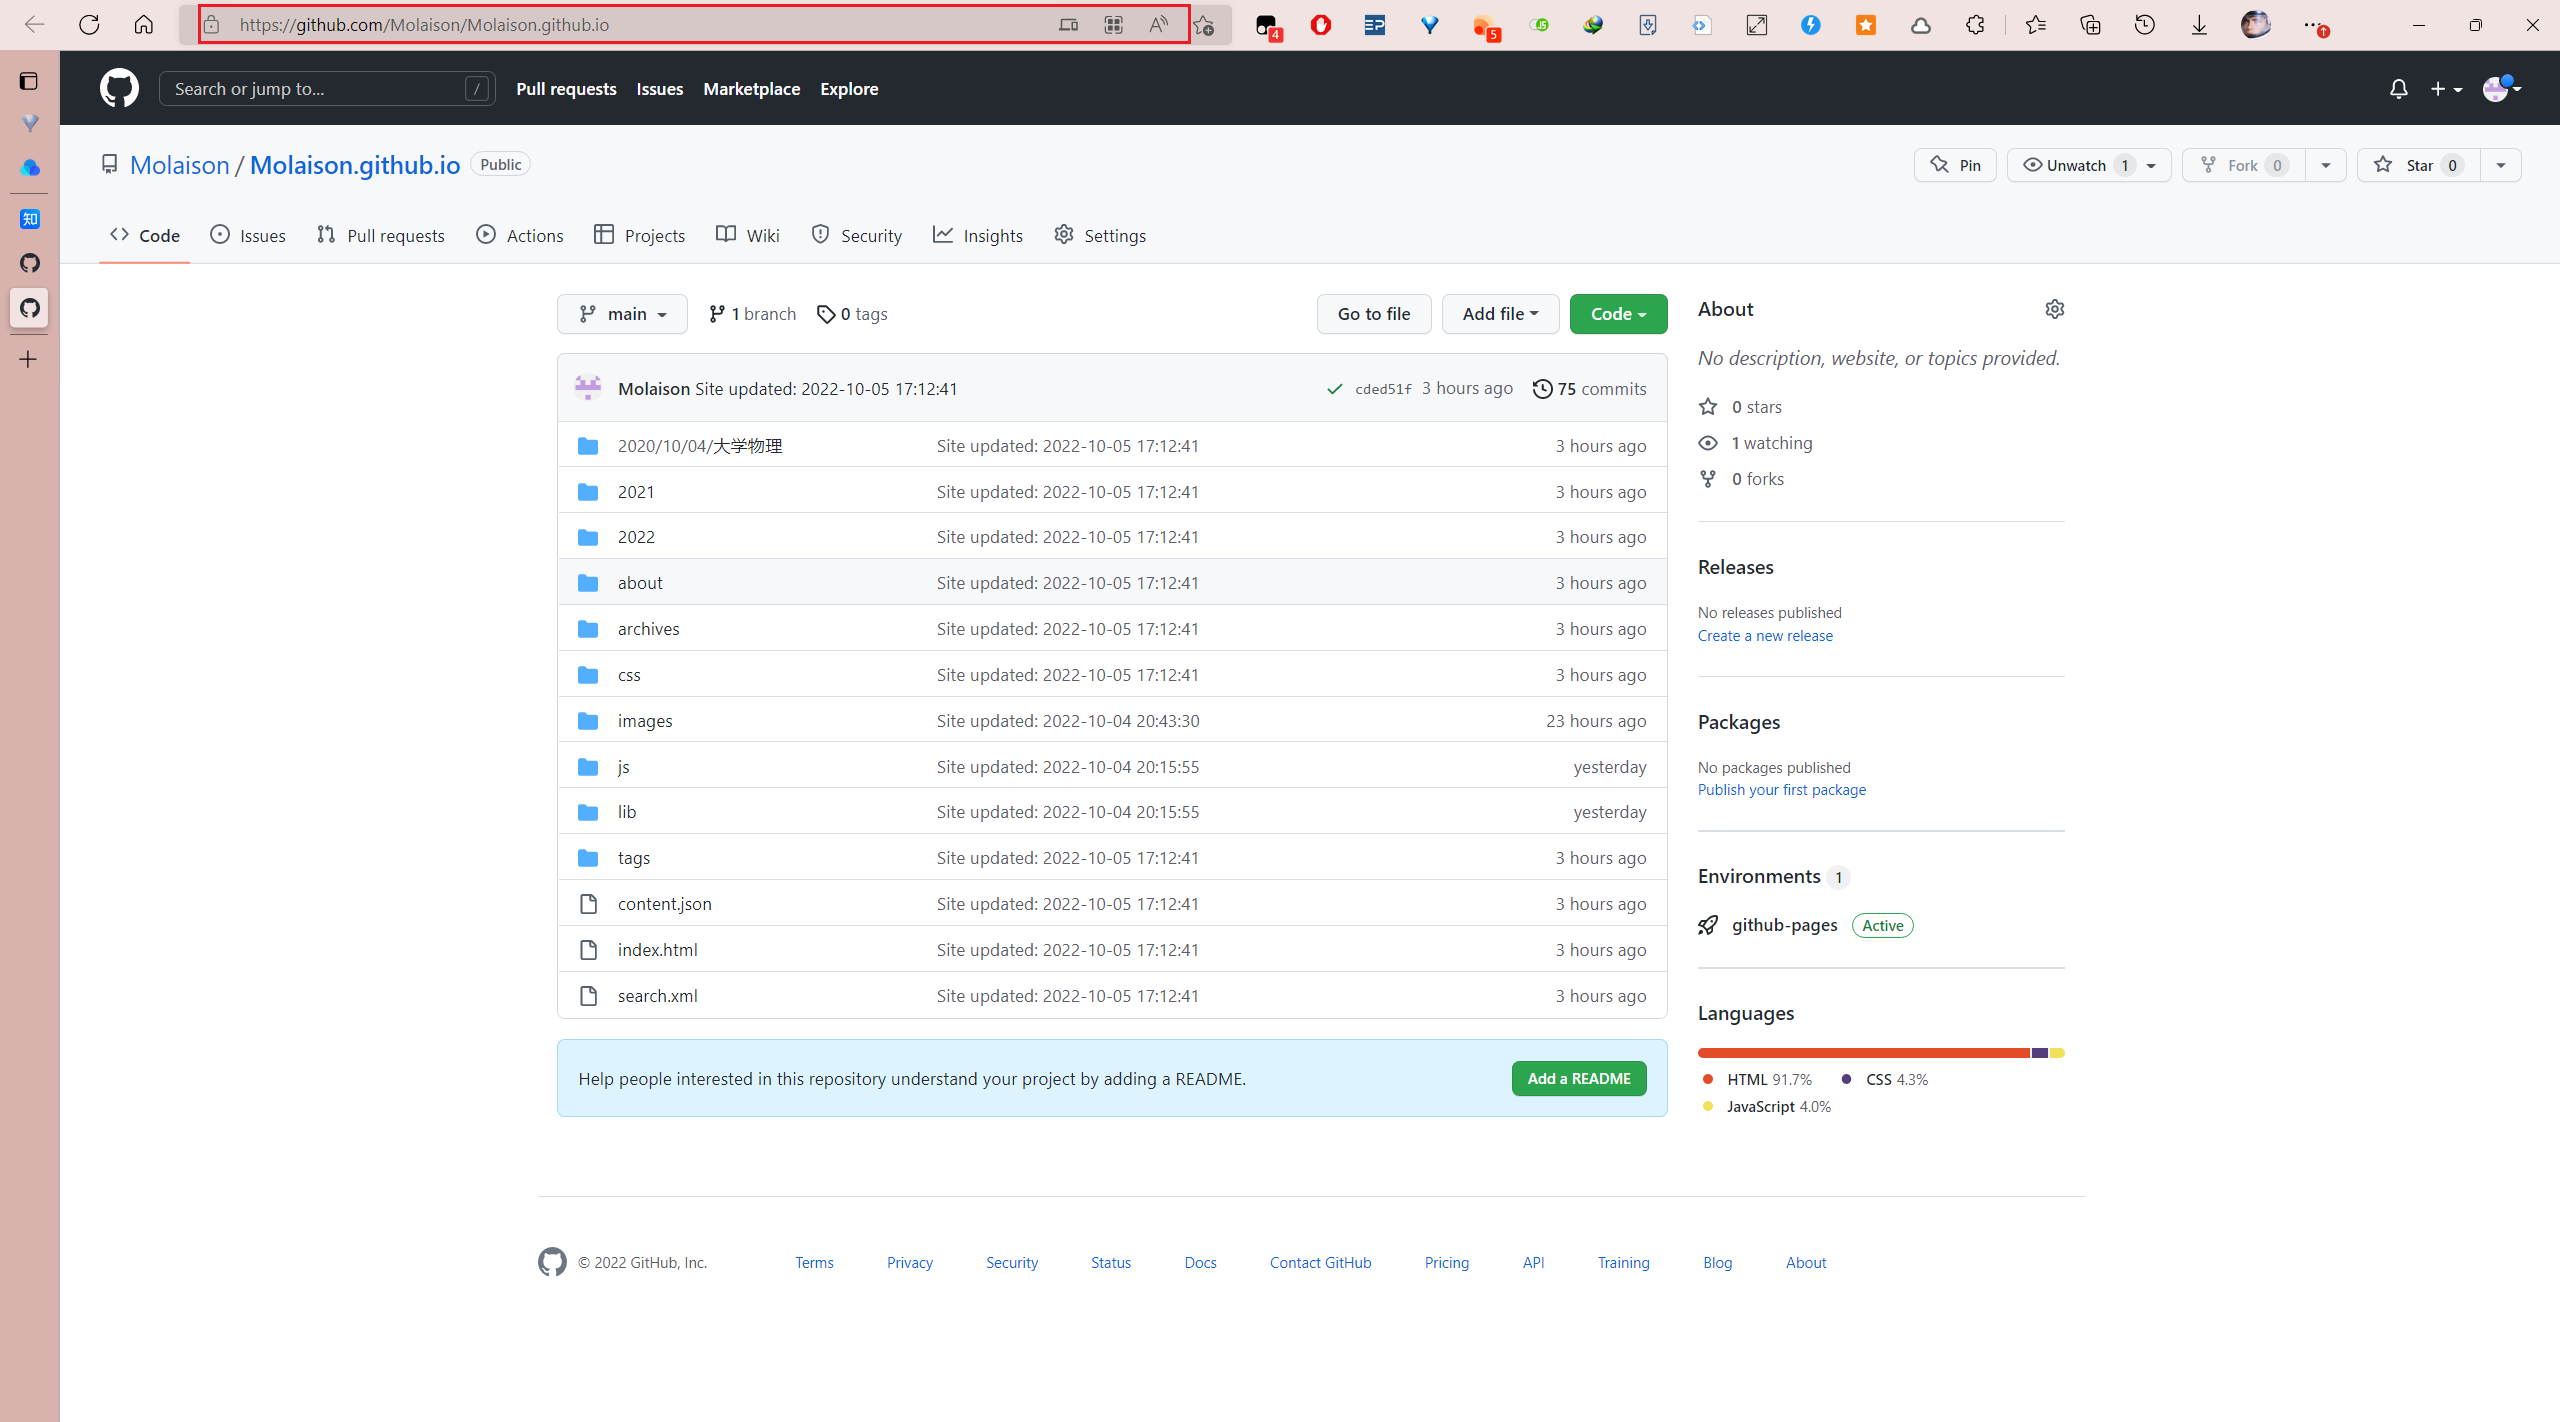
- url设置为你的Github库的网址, 即下图中红框部分;
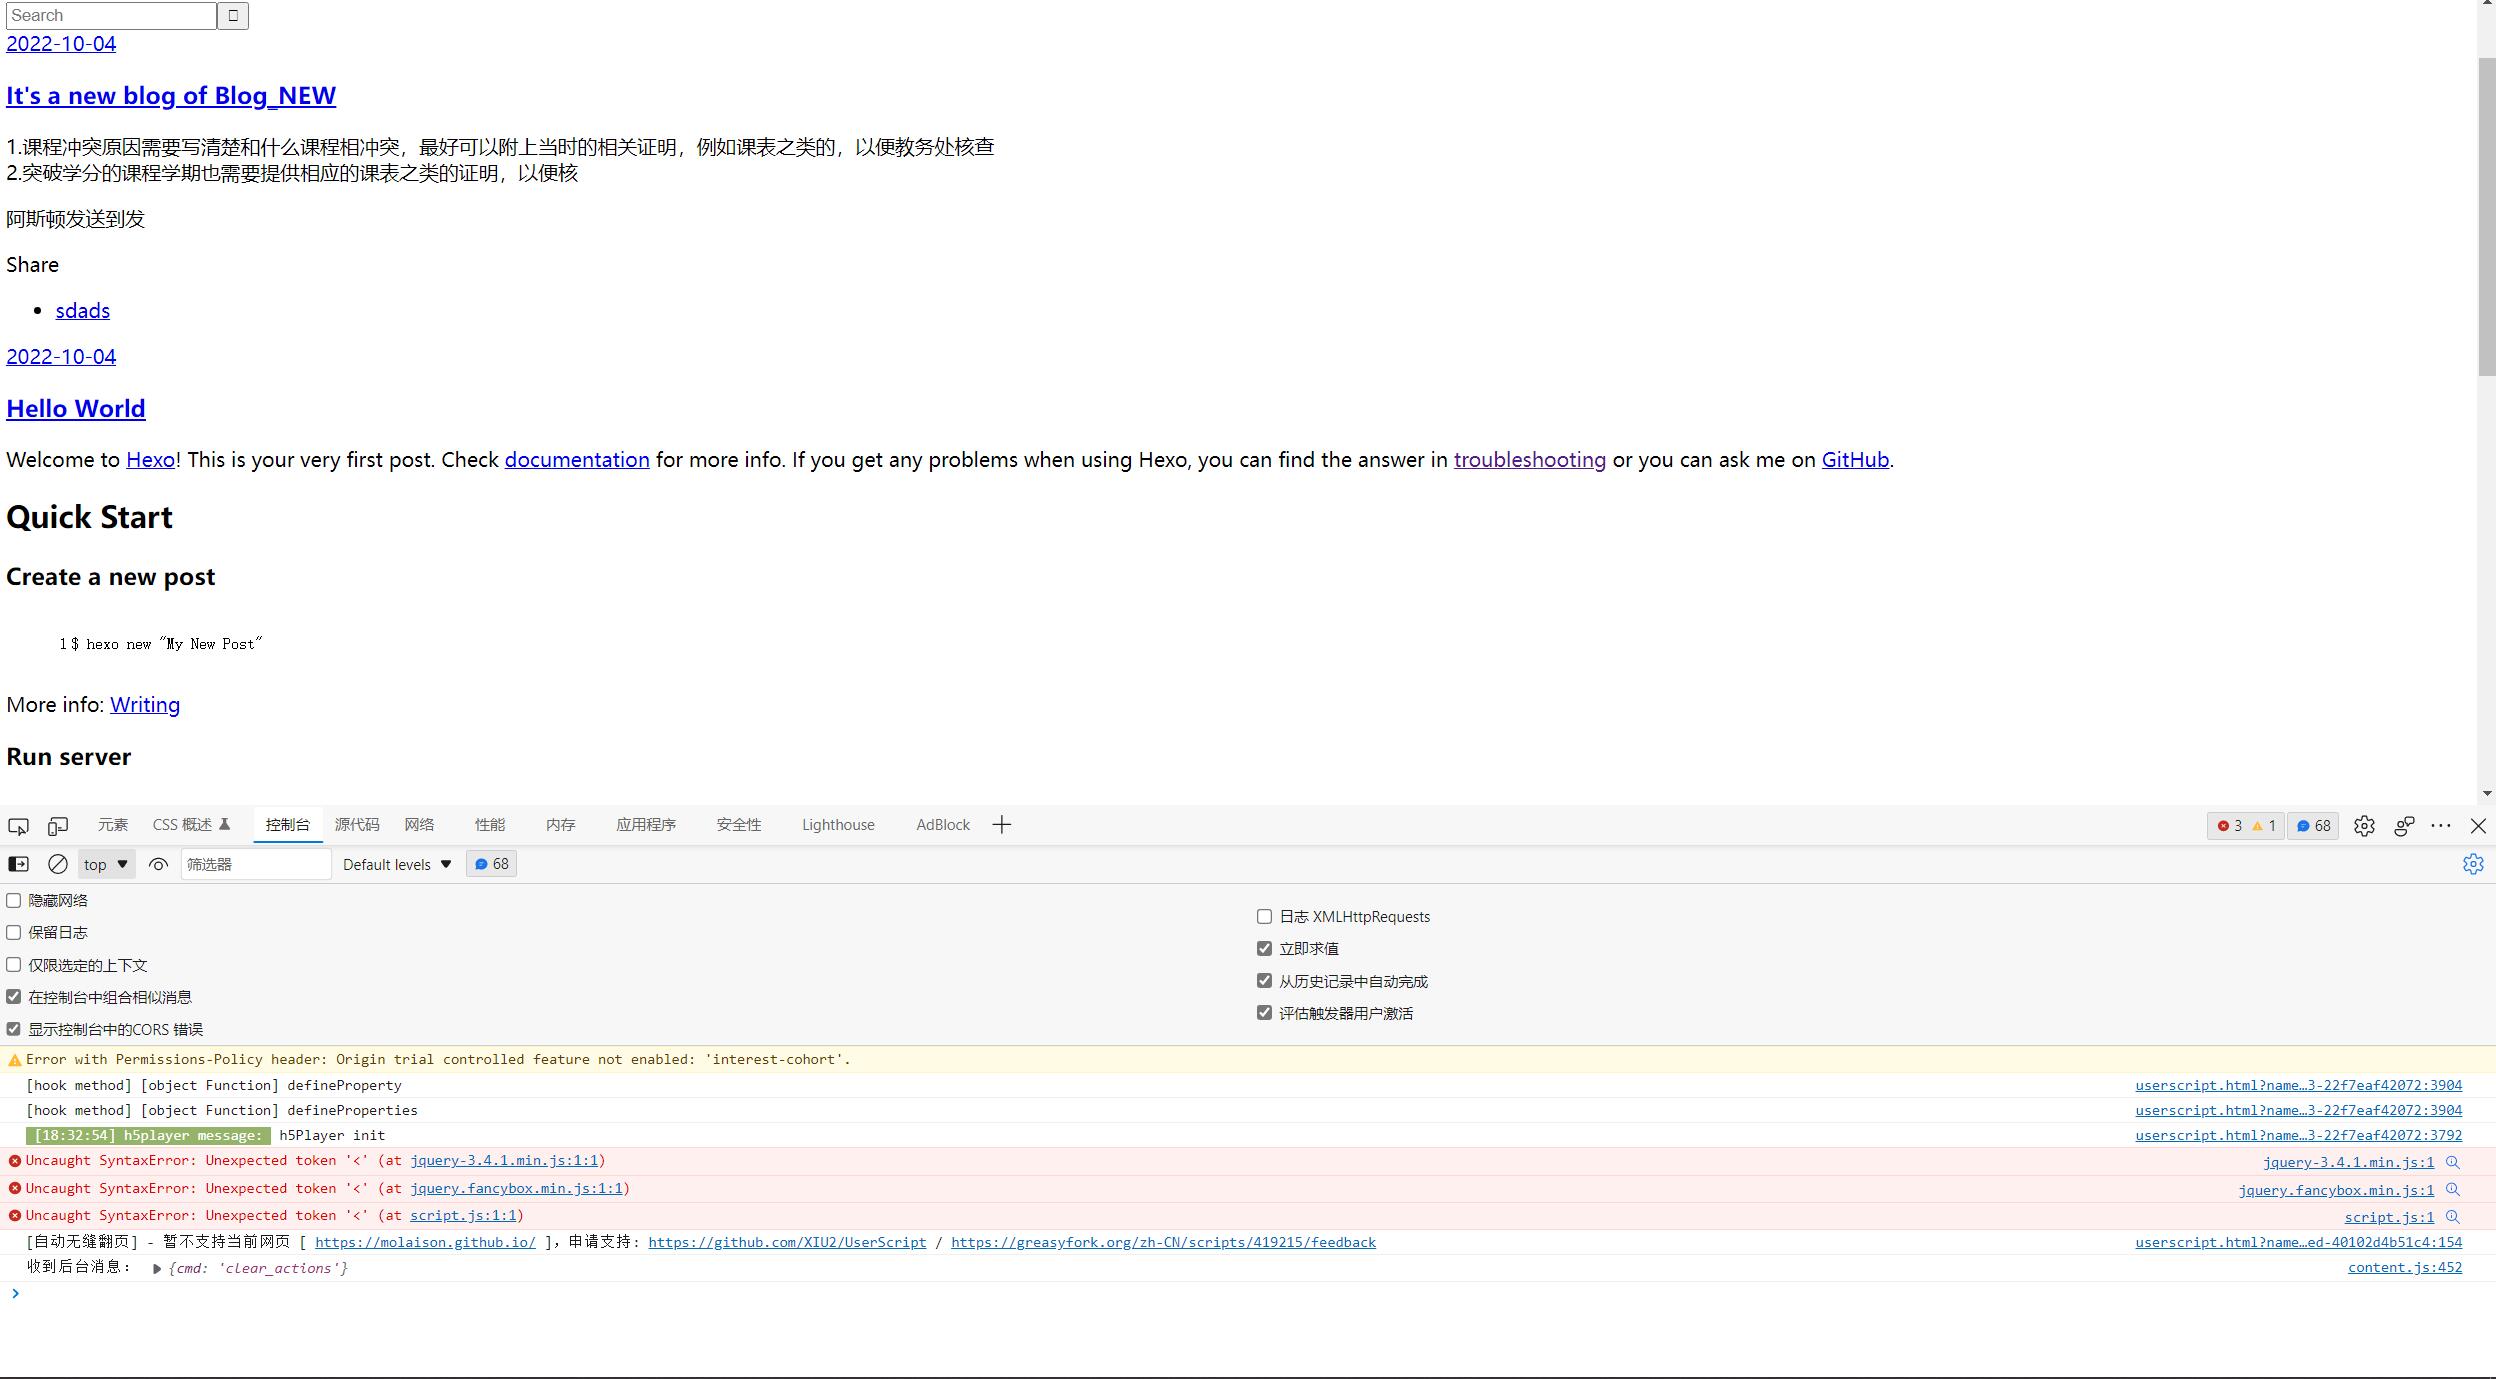
- root节点设置为”/“, 2022/10/4日实测不设置该节点 or 设置为”/name.github.io/“ or “/name.github.io” 均会导致网站样式表无法加载, 呈现下图样式, 具体原因可能是js文件路径错误导致;
1 | ## Set your site url here. For example, if you use GitHub Page, set url as 'https://username.github.io/project' |
主题配置
打开目录”theme\next\”下的_config.yml文件, 主题配置主要在此文件中进行;
布局设置: next主题提供了四种布局,可依照需求选择,预览效果见awesome-next给出的示例,即”Live Preview”下的链接;
1 | # scheme: Muse |
菜单设置: menu下的键值对代表侧边栏中是否含有该标签,即下图红框部分(由于设置了语言,这里显示为中文,但并不是通过翻译实现,而是在next主题目录下的language文件夹中对应的yml配置文件中,使用键值对实现);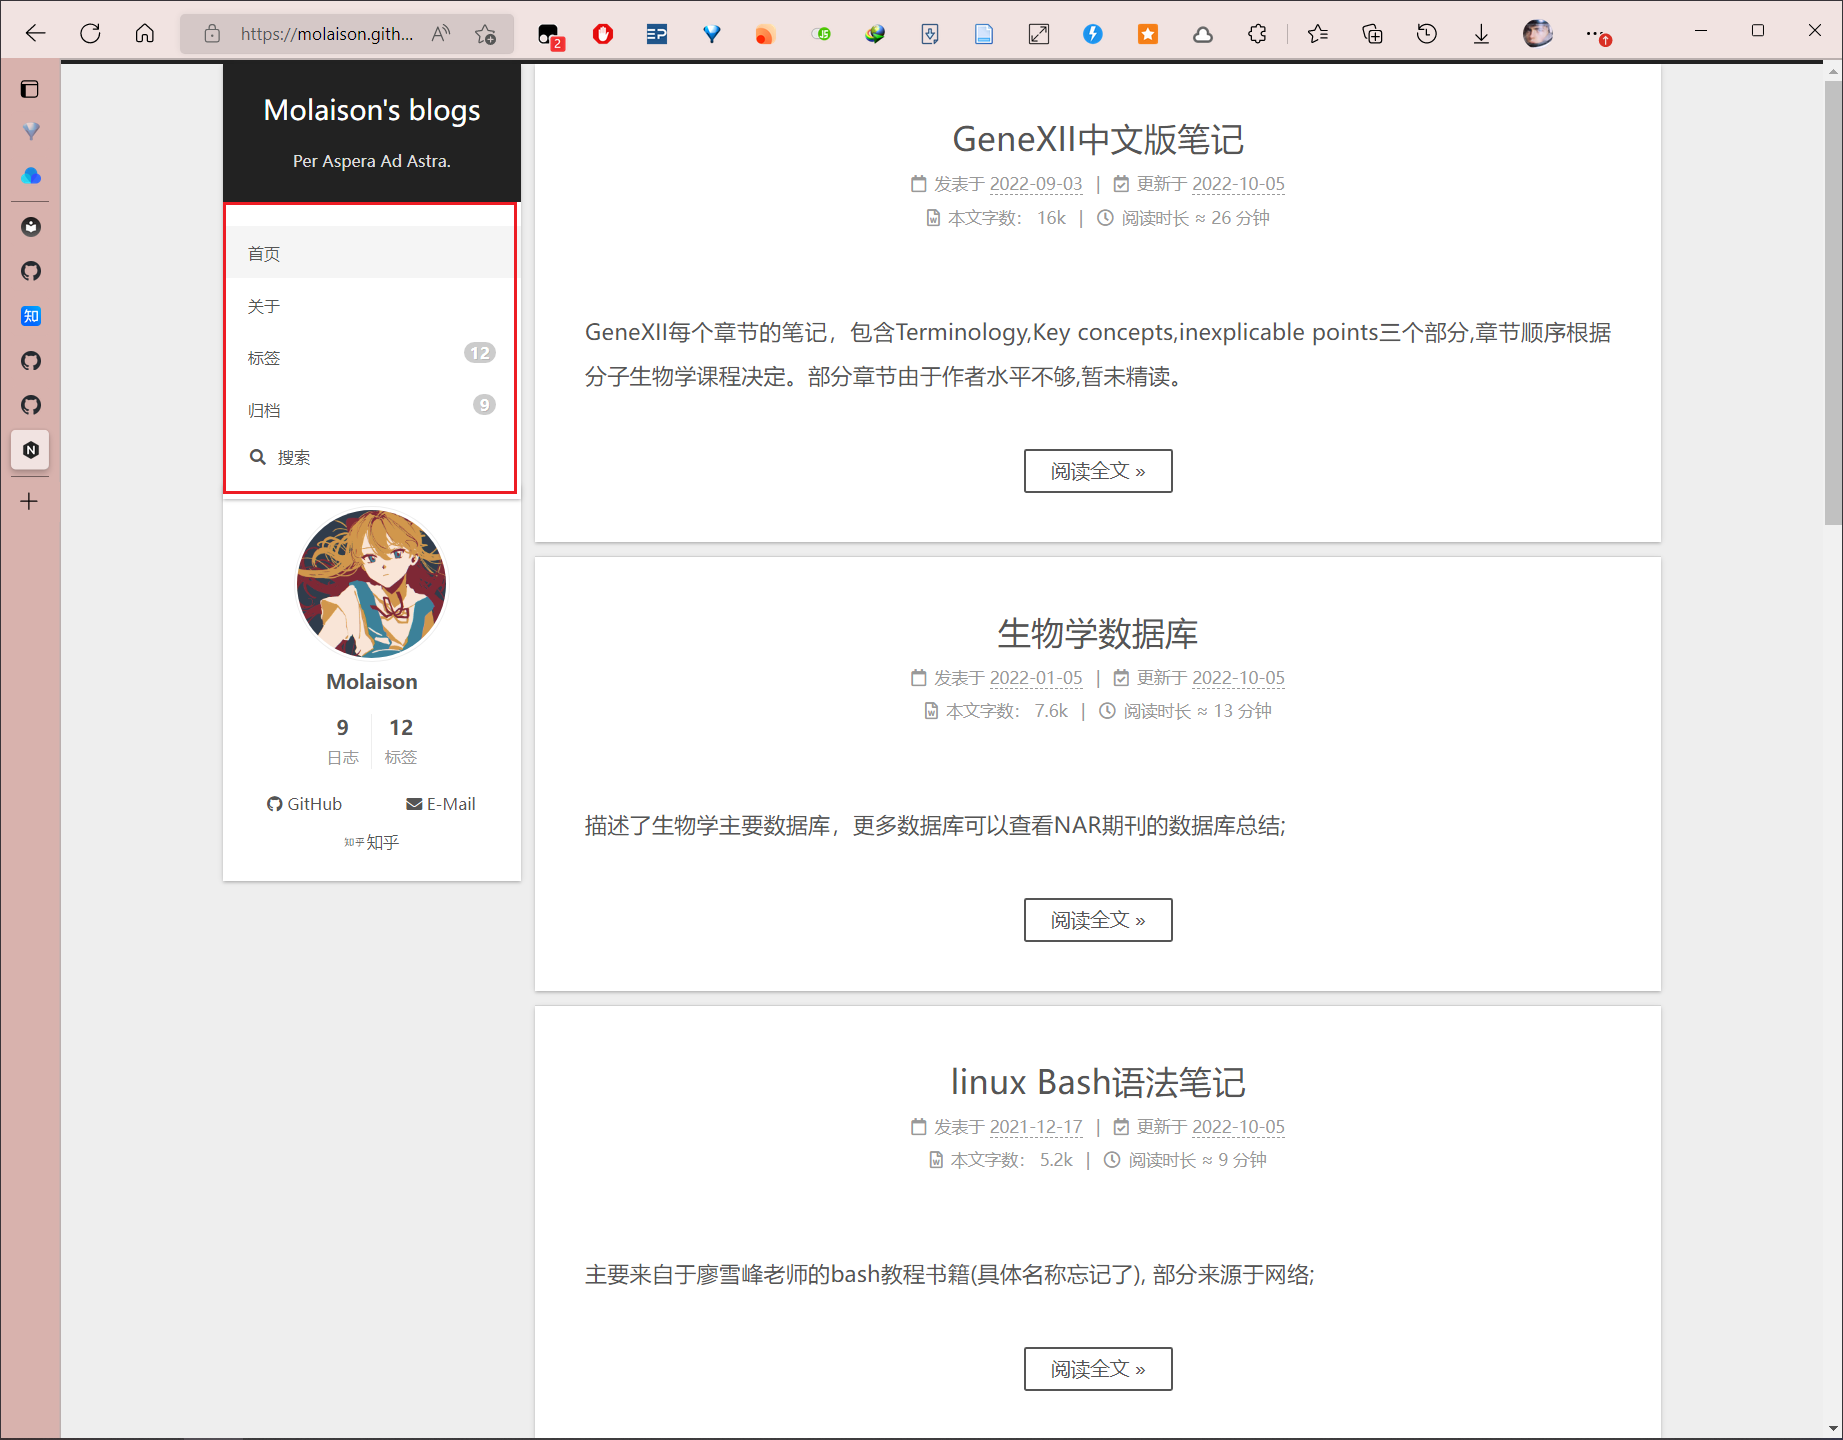
menu_settings中icons和badges分别表示是否显示图标和计数符号;
1 | menu: |
侧边栏设置:设置侧边栏位置;
头像设置: 根目录->theme->next->source->images->avatar.gif,调整图像大小,随后将其转成gif即可;
1 | sidebar: |
文章目录设置:
1 | toc: |
代码块主题设置: 更多可用主题可以查看next-highlight code;
1 | codeblock: |
